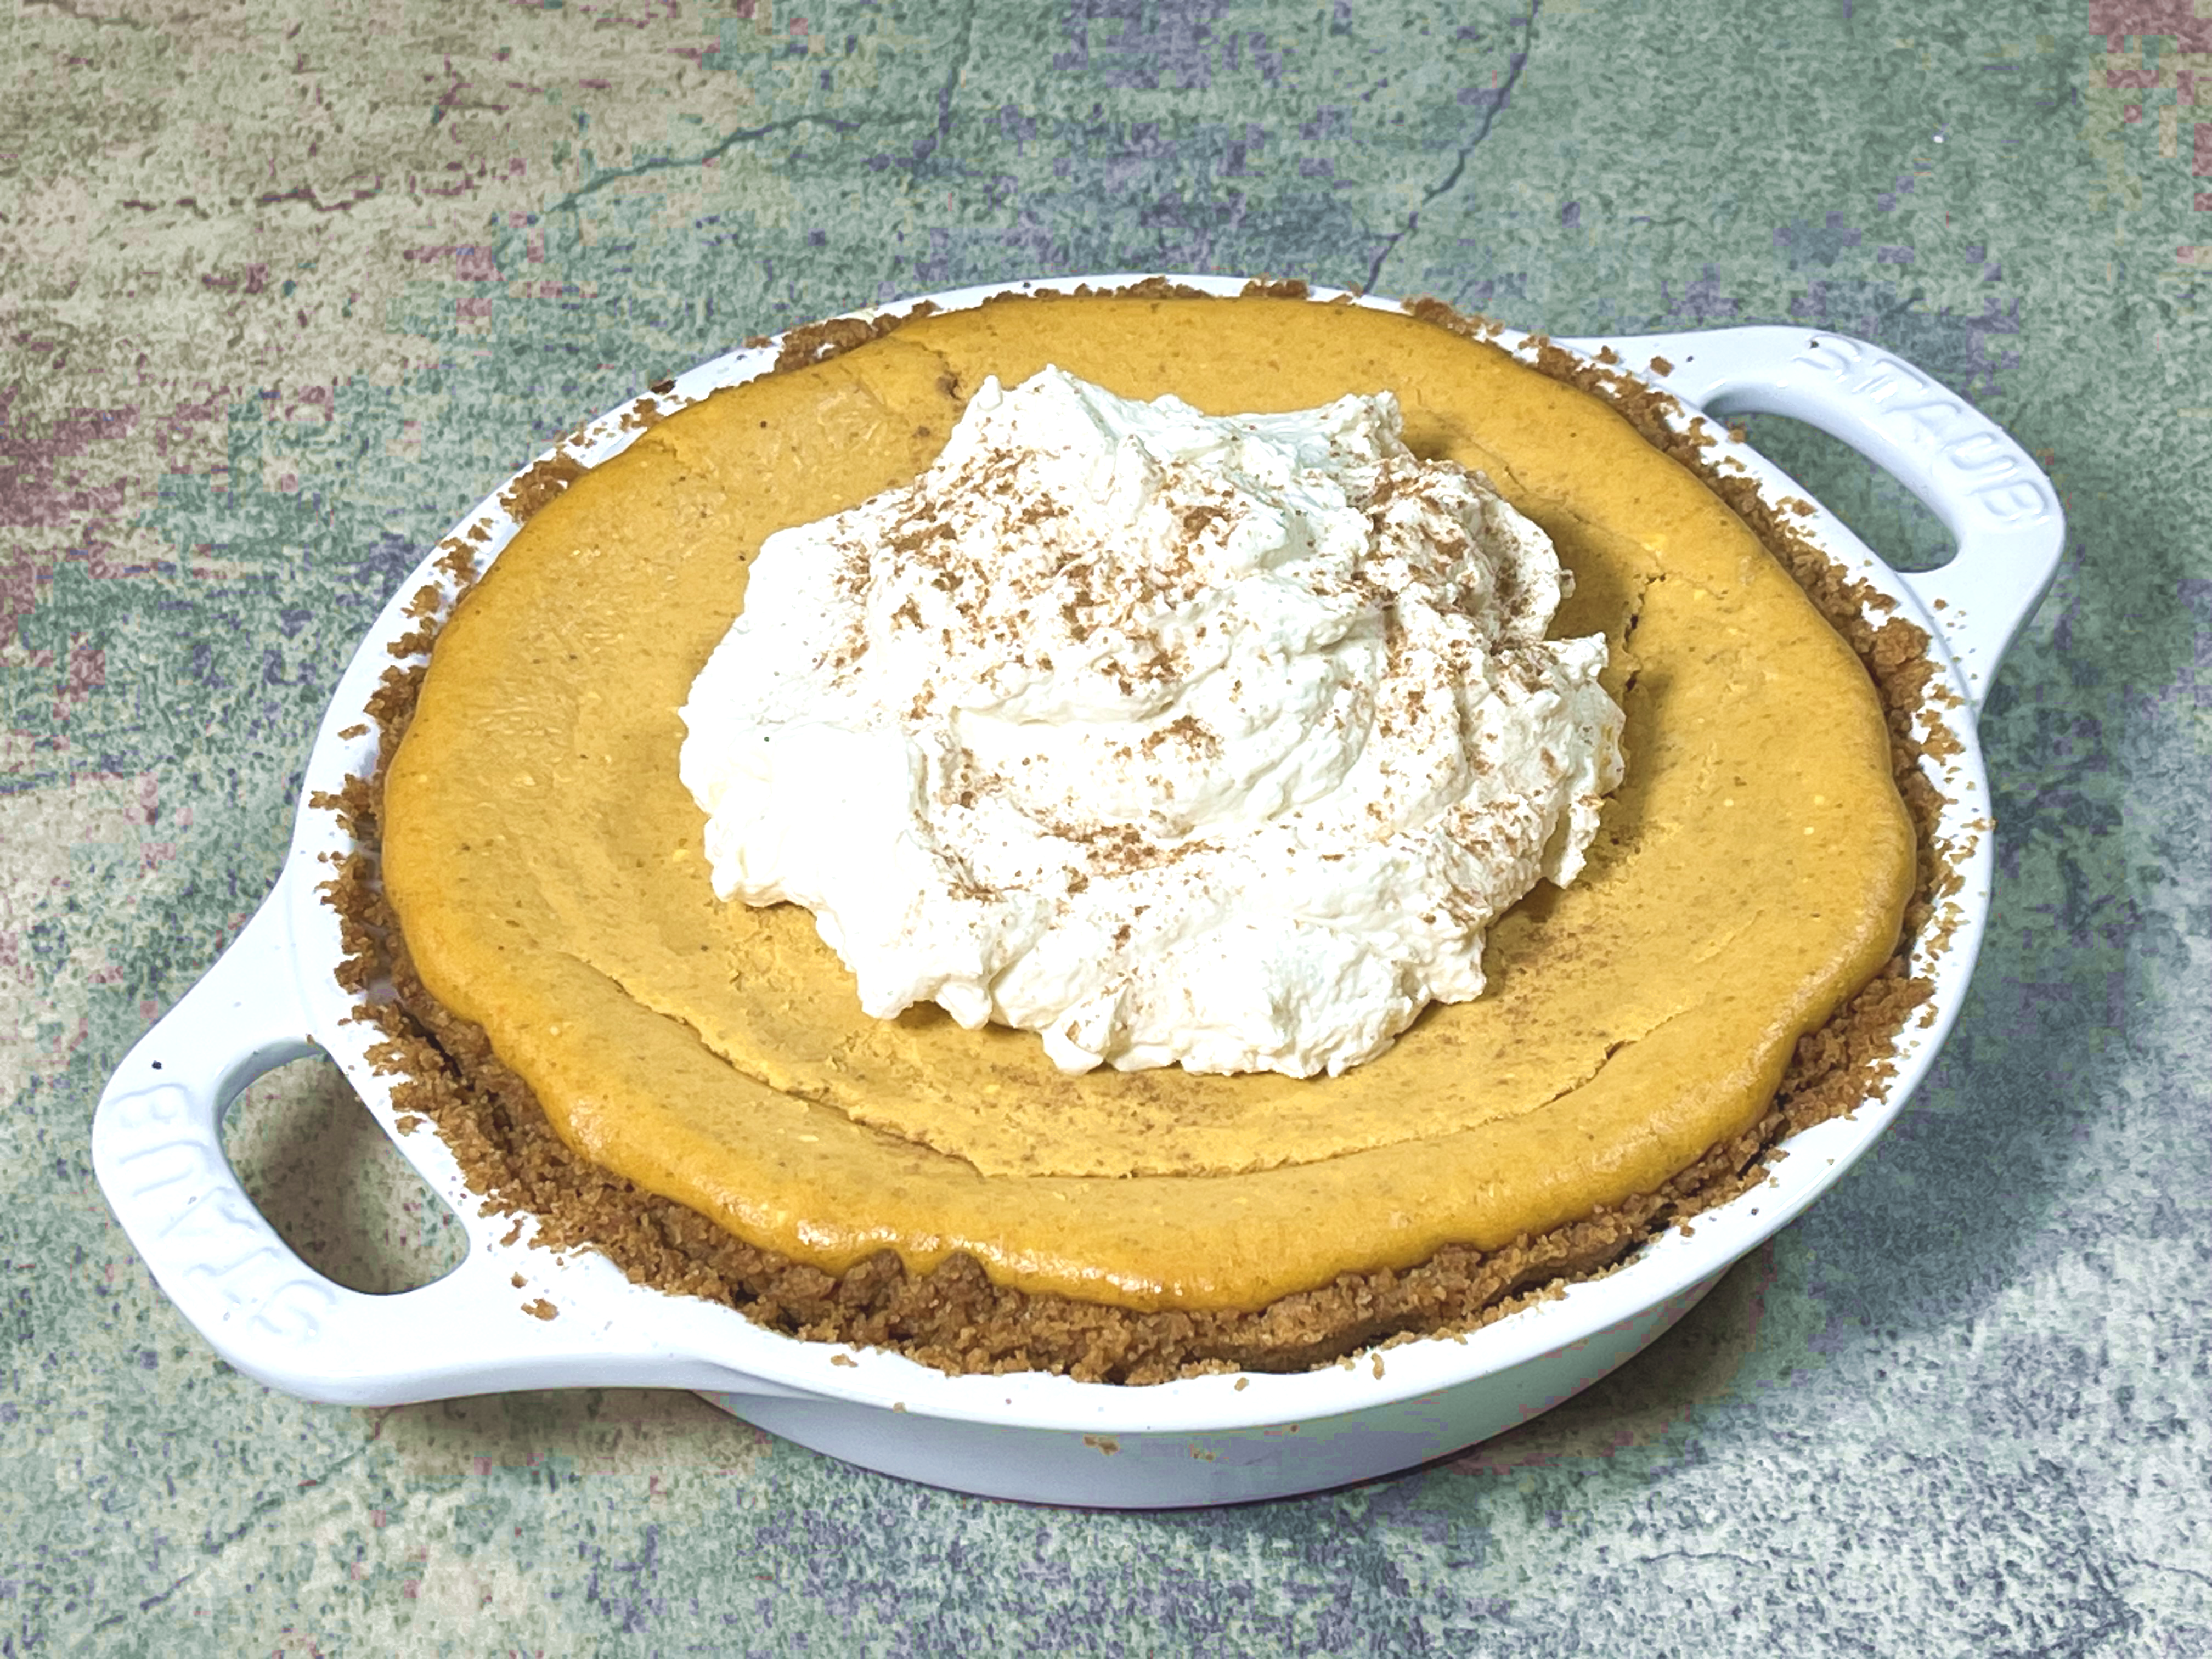
With Halloween and Thanksgiving fast approaching, I am probably not the only one craving pumpkin desserts, right? I guess it is just something about fall. Last year, you may remember I posted my recipe for the decadent two-layer dessert with cheesecake for the bottom layer and pumpkin pie for the top layer [ Click here for that recipe ]. This year, I decided to combine the ideas for the two layers from last year’s recipe and create an extra easy and yummy pumpkin dessert called Pumpkin Cheesecake Pie that you can whip up quickly but will look and taste amazing. This dessert can be cooked without the crust for a gluten-free version as well.
I started with my dad’s cheesecake recipe. He made the best cheesecakes, from plain cheesecakes to chocolate rum ones, so I decided his basic recipe would be a great place to start for the pumpkin cheesecake filling for the “pie”. In the bowl of the electric mixture, I combined the room temperature cream cheese, eggs and sugar until they were smooth. Then I added a can of pumpkin puree, pumpkin pie spice and vanilla! Sounds yummy and easy, right?
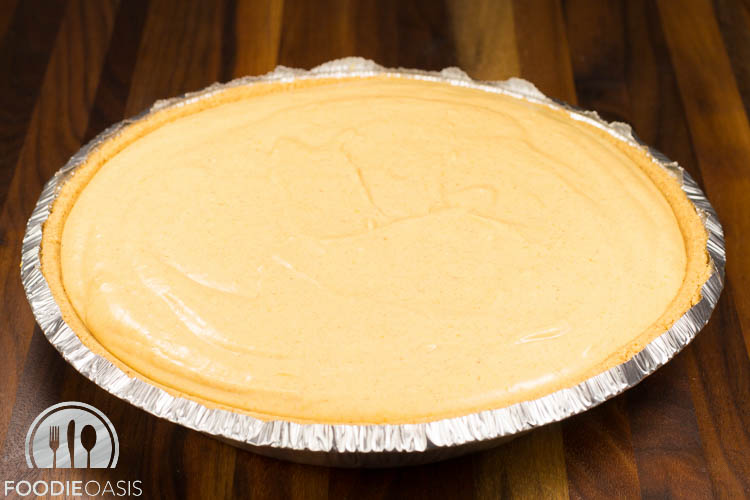
Now for the extra easy part. No spring form pan and no graham cracker crust to make. I just bought a large, pre-made graham cracker crust—ready to use. Then I poured the filling into the crust until it was almost all the way to the top edge.
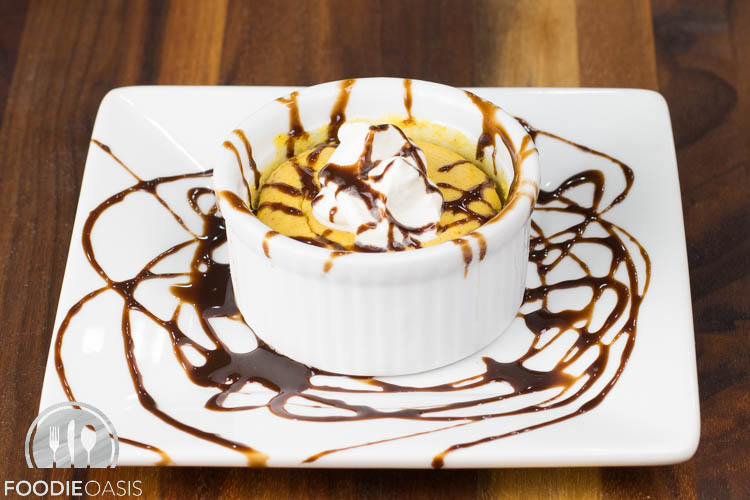
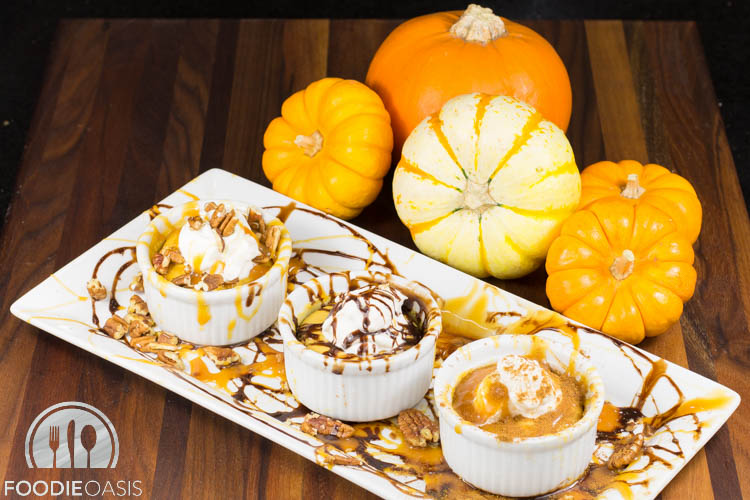
I had a little extra filling, so I wanted to experiment with cooking the same filling it in custard cups for a gluten-free version. I poured the remaining filling into four custard cups and set them in a larger baking dish filled with a little water. The water came 1/3 to 1/2 way up the sides of the custard cups.
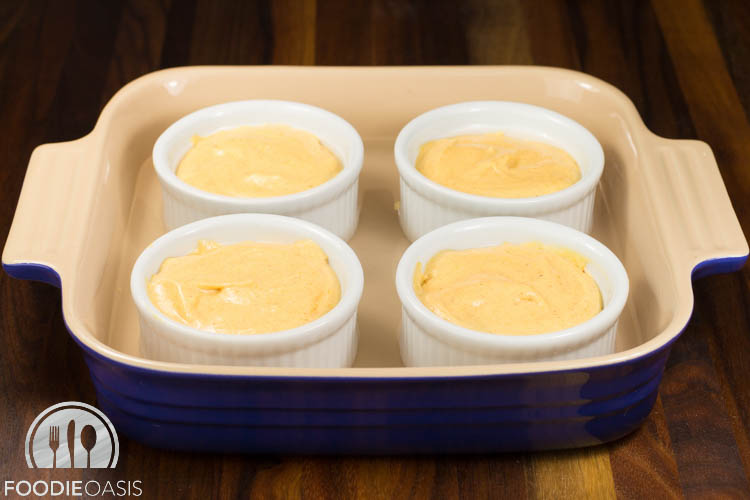
Then I baked the pie and the custard filled cups in a 325 degree F oven. The custard cups were set in about 20-25 minutes, so I removed them to cool. The pie was ready in 45-55 minutes when the edges were set and the middle was just a little giggly. After they cool, they need to be refrigerated until they are fully set up. Then it is time to decorate them.
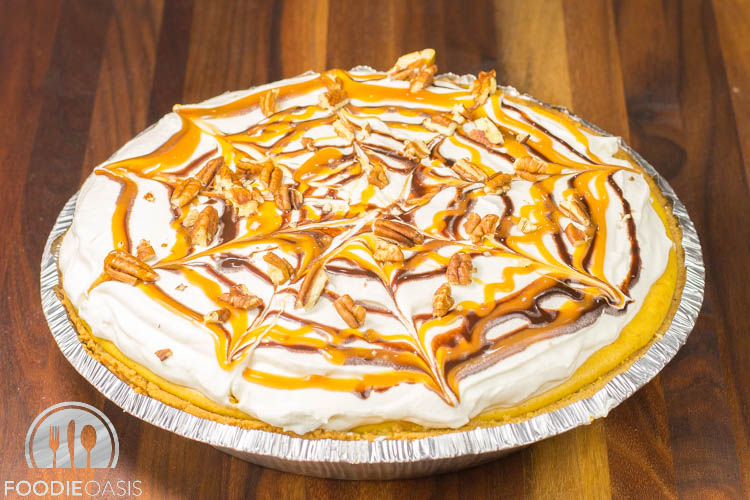
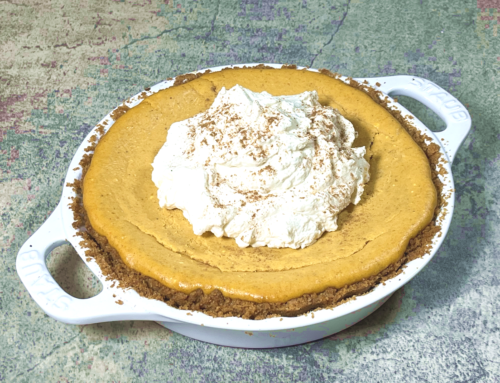
For a little Halloween twist, I decided to create a spider web look on top of the pie with whipped cream, caramel and chocolate sauce. What could be better? I whipped 2 cups of heavy cream with a little powdered sugar and vanilla. Then I spread it on top of the cooled pie. Of course, I had to taste the cream a few times along the way just to make sure it was just right. 🙂 To keep the extra easy theme going, I bought some caramel sauce and chocolate sauce, but you could make your own. Zip top bags are great for fast decorating, so I put some of the caramel sauce in one zip top bag, cut off a small part of the corner and set the bag in a glass to catch any drips. Then I did the same thing with the chocolate sauce.
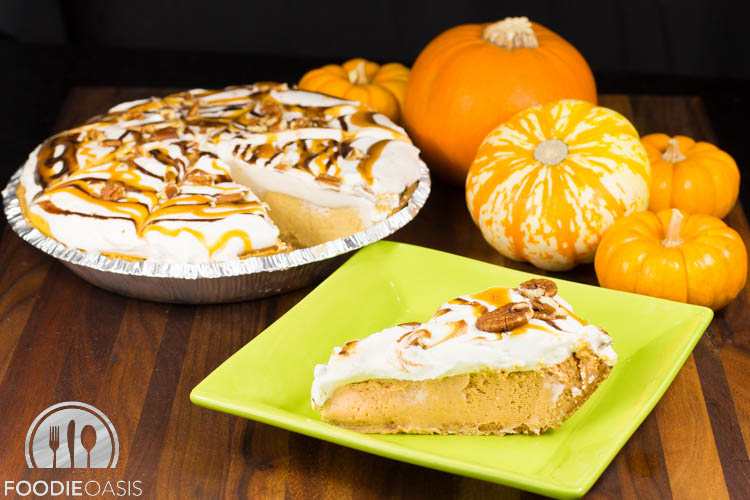
Now for the fun part. Starting at the outside, I “drew” a circle of caramel around the top of the pie, then drew another circle about an inch inside the first one and kept repeating this process until I reached the center of the pie. Don’t worry about making perfect circles. I didn’t, and it still looked great! Now for the chocolate. I drew a chocolate circle between each pair of caramel circles. Then using a toothpick, I created the spiderweb pattern by starting at the center of the pie and gently dragging the toothpick to the outer edge. Then I rotated the pie and repeated until I had finished the pattern. For a final touch of crunch, I sprinkled a few chopped pecans on top.
Of course the custard cup versions needed some chocolate too!
Or maybe ooey-gooey caramel, chocolate and pecans!
Now time for a taste! Wow. It is really good. Luscious, creamy and lightly pumpkin-y with a nice hint of the pumpkin pie spice, but not too much. Just what I had hoped for. Who knew that cheesecake could be so easy! The recipe is below, so try it and let me know what you think.
© 2015 FoodieOasis