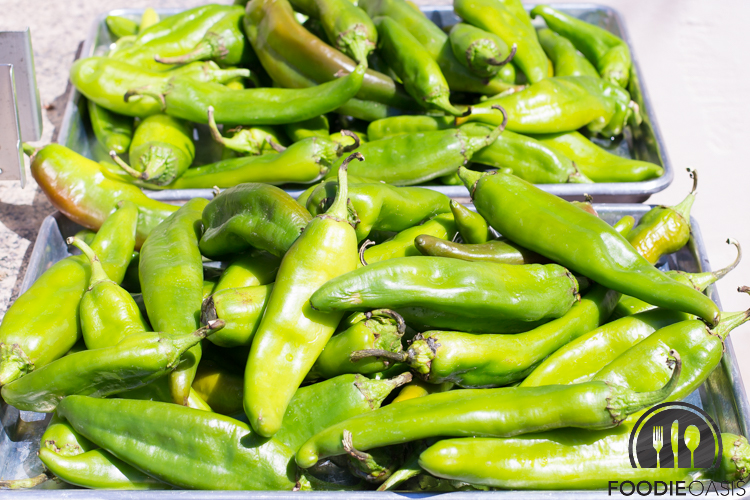
In August each year, green chiles from the Hatch Valley near Hatch, New Mexico start appearing in a few of our grocery stores here in Southern California, but they are usually gone by the end of September. If you have ever visited New Mexico, you probably know these chiles make the best enchilada sauce for those of us who like a lot of spice in our Mexican food. That means, that I get excited when I see the signs posted that Hatch chiles have arrived! It means it is time for roasting.
What you may not know is that some Hatch chiles are a lot spicier than others because there are a number of different varieties of chiles grown in the Hatch Valley. How hot a particular chile is depends on how much capsaicin is in that particular variety. Capsaicin is a chemical that is odorless and tasteless but causes a burning sensation when it touches your tongue or skin. It is not water soluble, which is why drinking a lot of water doesn’t do much to relieve the burning sensation when you bite into a hot pepper. In fact, drinking water often makes the burning sensation worse because it spreads the capsaicin around your mouth bringing it into contact with even more areas. Next time you feel the burn, reach for dairy products (e.g., milk or yogurt), a little alcohol (e.g., a sip of rum but not beer because it contains too much water), a little oil, or sugar (e.g., some honey or a small spoonful of sugar). I have been known to grab a sugar packet at a restaurant and just pour it into my mouth. Maybe not the best table manners, but desperate times call for desperate measures, so try to forgive me 🙂
The amount of heat, or capsaicin, in a chile is measured in Scoville units. The hotter the pepper, the higher the rating. So a sweet pepper will have a rating near zero indicating that it has little or no heat. But a really hot pepper—think habaneros—will have a rating around 200,000 to 350,000, with some varieties of peppers rating over 1,000,000 on the Scoville scale.
So you ask, where do the Hatch green chiles fit on this scale. It turns out there is a wide variation depending on the variety of the chile. Some are as low as 350 while others are as high as 30,000. The variety that many people are most familiar with are Anaheim chiles, because they are also grown outside of the Hatch Valley, and they are one of the milder versions at 500-2,500 on the Scoville scale. Anaheim chiles are said to have gotten their name when seeds where brought from New Mexico to Anaheim, California in the late 1800s. But Big Jim’s rate around 5,000-7,000 and the extra hot Barkers hit 15,000-30,000 on the Scoville scale. For comparison, jalapeno peppers typically range from 2,500 to 8,000 and serrano peppers range from 8,000 to 22,000. So don’t be fooled, the hot and extra hot versions of Hatch chiles have a mighty kick!
I like to have roasted Hatch chiles to use throughout the year, so I tend to buy around 10 pounds, roast them, and then either make sauce to freeze or just freeze the chiles to use later. Over the last three or four years I have been experimenting with mixing milder versions of the chiles with a few of the spicier chiles to get just the right level of heat for Jeff and me. This year I bought about 7 pounds of milder chiles and 3 pounds of hot (not extra hot) ones. Now time for roasting.
Wash and dry the chiles. Then fire up the grill! I used to roast these one pan at a time under the broiler in my oven, but as I started stockpiling more and more roasted chiles, this approach took forever! It also released so much of the chiles’ heat into our kitchen that our eyes were burning! So if you are doing a large batch, fire up the grill.
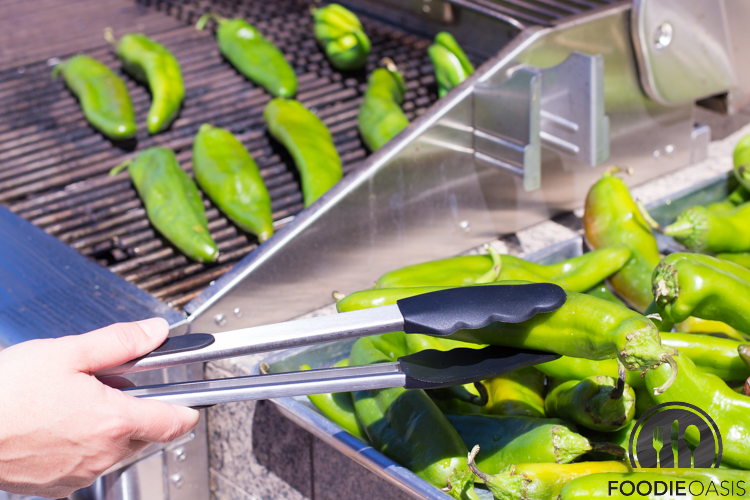
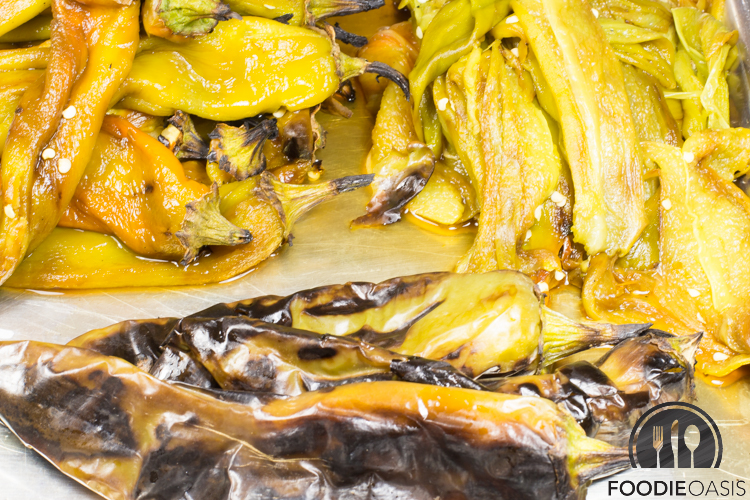
The goal is to char all sides of the chiles. It will not take too long. Just a few minutes on each side. The skin will char and start to puff up and pull away from the chiles. Don’t worry about burning them because you are trying to burn them. If you are roasting a smaller batch in the oven, turn on the broiler and place the top rack about 4 to 6 inches below the broiler. Place the peppers in a single layer on a cookie sheet. Watch them carefully. You will need to use tongs to turn the peppers every 5 to 7 minutes until they are roasted on all sides, even the edges. To get the edges (the narrow sides of the peppers) roasted, you may have to prop a few of the peppers against each other.
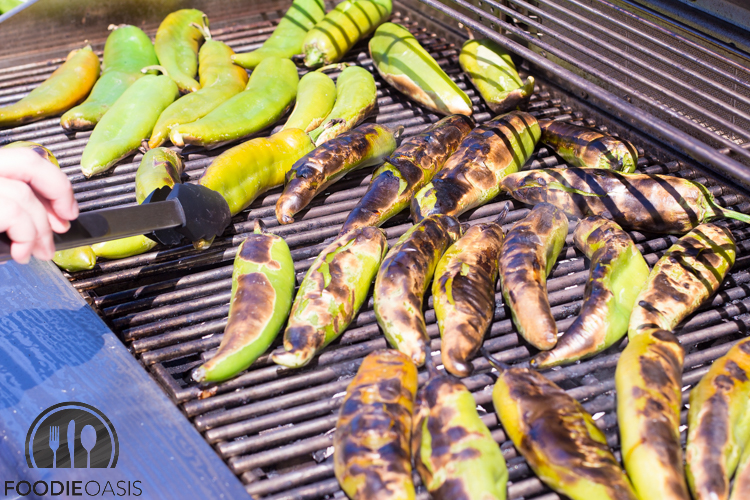
When they are charred on all sides (including the edges), place them on a cookie sheet and cover them with plastic wrap. The goal is to let them sweat. This will make it easier to pull the charred skin off of the peppers.

When the peppers are cool, it is time to peel them. This task is a little tedious, but your patience and care will be rewarded. So pick up one of the peppers. However, unlike the picture below, put on a pair of plastic gloves before picking up the peppers. While my hands are fairly insensitive to the heat from many peppers because I chop serranos and jalapenos all the time without using gloves, I seem to always forget how hot some of the Hatch chiles are. Translation: I forgot the gloves and my hands were really burning after peeling the 3 pounds of hot chiles! Solution: Use gloves for even the mild ones, so you don’t risk the pain! Believe me, it is not worth it.
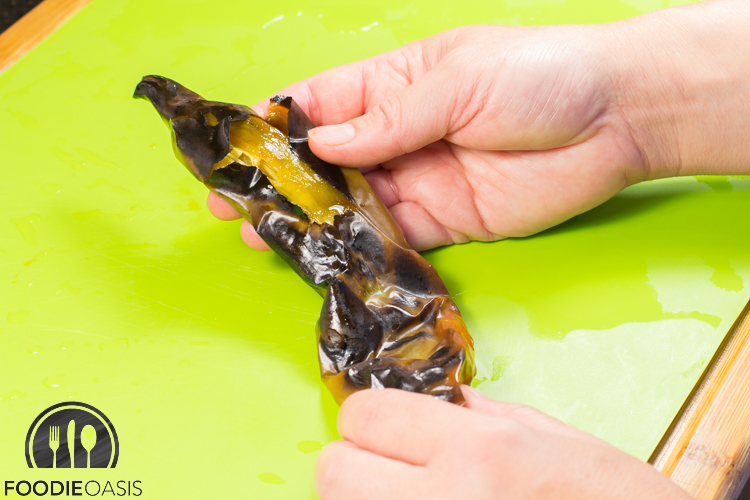
After you pick up the pepper, grab some of the lose skin and start peeling it off. If you roasted the peppers long enough and let them sweat until cooled under the plastic wrap, the skin should come off easily.
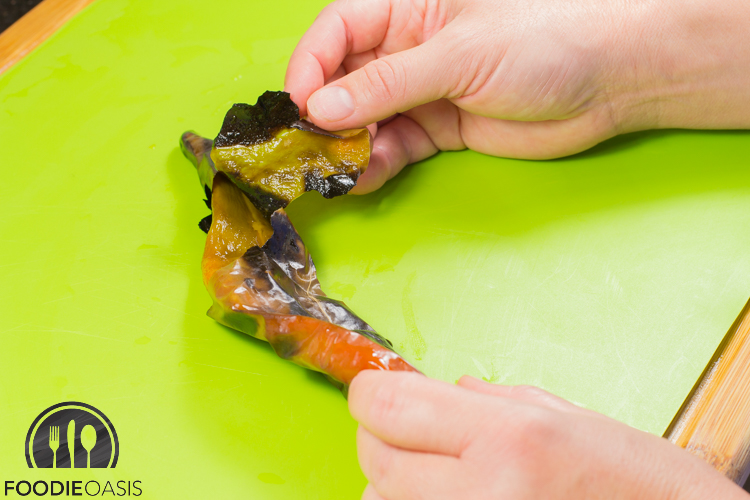
When you get all the skin off, you will be left with a beautiful Hatch green chile.

I find it easiest to peel all the chiles before starting to remove the seeds. If you are using two different types of chiles (e.g., hot and mild), just be careful to keep them separate because they all look the same.
To remove the seeds, split the chile open by making a slice through one layer from the stem to the tip of the chile. Then carefully place your knife under the long strands holding the seeds and separate them from the chile as shown below.
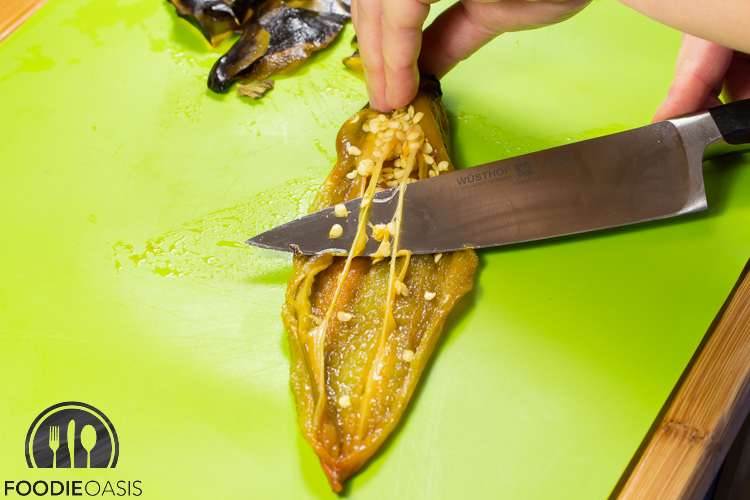
Then using the back side (not the sharp side) of your knife, gently scrap the seeds away moving from the tip of the chile toward the stem.
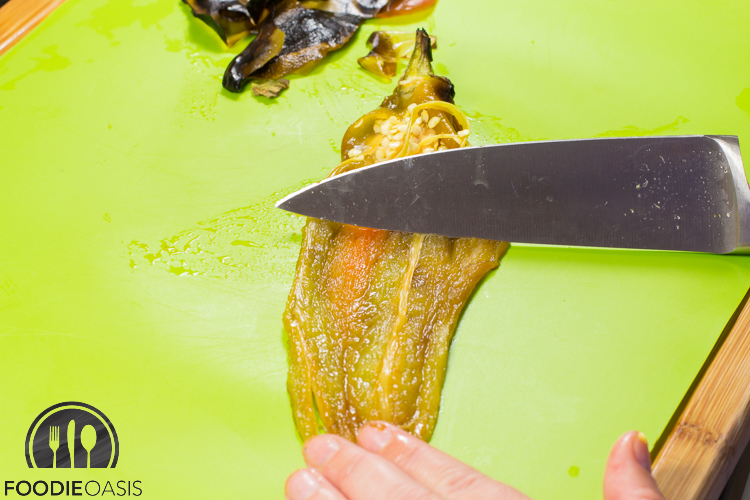
When you reach the stem, either slice it off or just push it away.

Repeat until all the chiles are ready. This year, I decided to freeze the chiles whole so I can turn some into sauce later and use some chopped in various Mexican dishes throughout the year. When I pull some of these out of the freezer to make sauce, I will post the recipe. But the Hatch chile season is almost over (it is really a short season), so hurry to the store if you want your own supply of roasted chiles. Of course, you can always just order some Hatch green chile sauce from one of the many online sites, but nothing is as good as homemade.
© 2015 FoodieOasis