For those of you thinking about making the cream puff recipe I recently posted, here are step-by-step instructions and photos you can follow. Try out the recipe and let me know what you think.
Cream puffs, profiteroles, éclairs, and gougères all start with a dough called choux pastry or pâte à choux. Sounds fancy, right? Until I decided to post this article and the accompanying recipe, I really hadn’t given much thought to how these yummy treats relate to each other. But when you think about it, you are probably going to ask the same question that I asked—why are there so many names for such similar puffs and what makes them different? Here are a few thoughts and facts.
I was first introduced to these delicious creations by my mom—and no, she is not French, but she knows how to make these French desserts really well! When I was a kid she would make these luscious spheres, fill them with custard and call them cream puffs. Loved those days! She also occasionally filled them with ham salad as an appetizer for parties, but I didn’t really love those days because I have never been a mayo fan (interpretation—I really hate mayo!). That meant I left the ham-filled creations alone and held out for the ones with the custard :). I now realize that these delicate little spheres could make a great appetizer, so I am going to experiment with other chilled fillings sans the mayo. If I come up with a good filling, I will let you know. (By the way, anyone else out there always say “no mayo”?)
I have also always loved éclairs, which are really just elongated cream puffs topped with chocolate ganache-like “icing”. Can’t go wrong with those! Of course, I could just eat the chocolate by the spoonful, but, of course, by now you know how much I love chocolate. Then comes profiteroles, which Jeff and I like to share when we see them on a menu. They usually turn out to be small “cream puffs” filled with little scoops of ice cream instead of custard and topped with chocolate sauce or caramel. However, my understanding is that the term profiteroles can also refer to traditional cream-filled puffs. Based on what I have read, it is in the U.S. that we call them profiteroles instead of cream puffs when you substitute ice cream for the cream or custard. I think everyone else just calls all versions profiteroles, but hopefully, my friends from France will let me know if that is true.
Then what about gougères? They are a savory version of the puffs created by mixing shredded cheese into the dough and skipping the filling. Thus, some people just call these cheese puffs. Gruyère, Comté, or Emmentaler are traditional options for the cheese, but you can substitute sharp cheddar or other cheeses depending on your preferences. To make gougères, add about 4 ounces of grated cheese and optionally, 1/4 to 1/2 teaspoon of coarsely-ground black pepper to the pâte à choux recipe. Then just skip the filling. These are great warm out of the oven.
But how hard are these to make? I know the first time I wanted to make them, I wasn’t sure how hard it would be. But Mom had given me her recipe, and I had watched her make them many times, so what could go wrong? Fortunately, it turns out they have very few ingredients and are not hard to make once you learn not to take them out of the oven too soon. I did mess that up a few times in the beginning. It turns out that if you don’t cook them long enough, they collapse! Otherwise, they are really straightforward to make. But just in case you are a little concerned about giving these a try, here is a step-by-step guide with photos. I hope you will try them and let me know how they turn out for you. I also have a few suggestions for shortcuts for the filling.
Let’s get started by preheating your oven to 400 degrees F. Then bring the water to a boil in a medium-sized saucepan. Then add the butter to the boiling water and stir until it is completely melted.
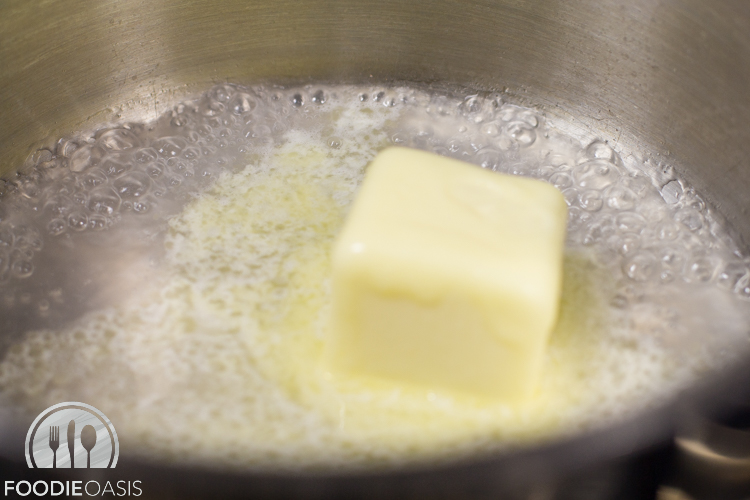
When the butter has melted, turn the heat down to low.
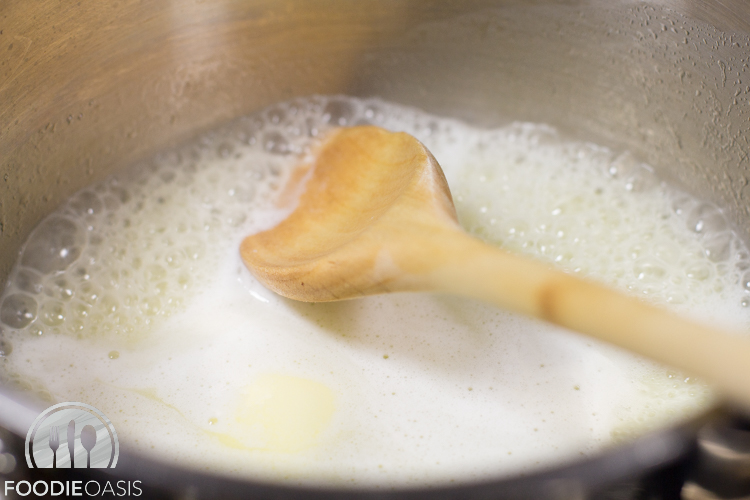
Add the flour and salt.
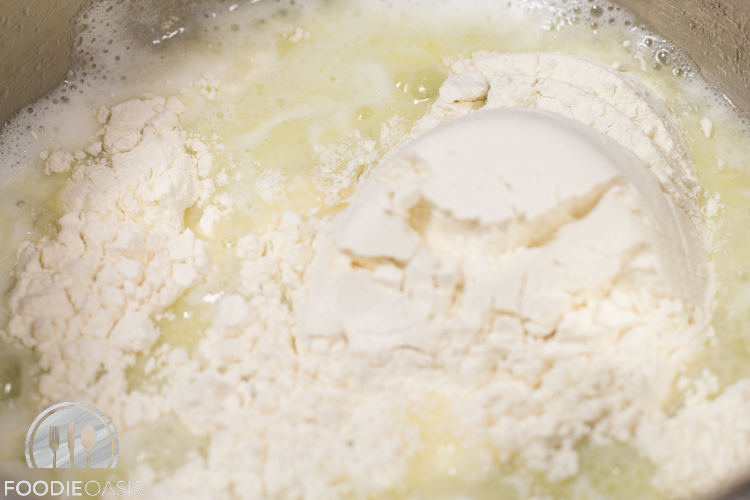
Now stir vigorously until the flour and butter mixture are fully combined and the flour mixture pulls away from the sides of the pan. This happens very quickly and should look like the photo below! It should only take about 30 seconds.
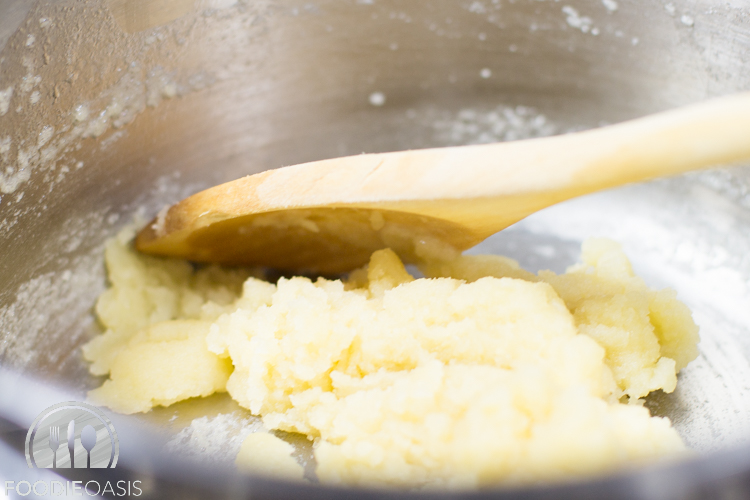
Now the next step is really important! Remove the pan from the heat and let the mixture cool for 1 1/2 to 2 minutes. The mixture needs to cool a little before you add the eggs, so you don’t end up with scrambled eggs!
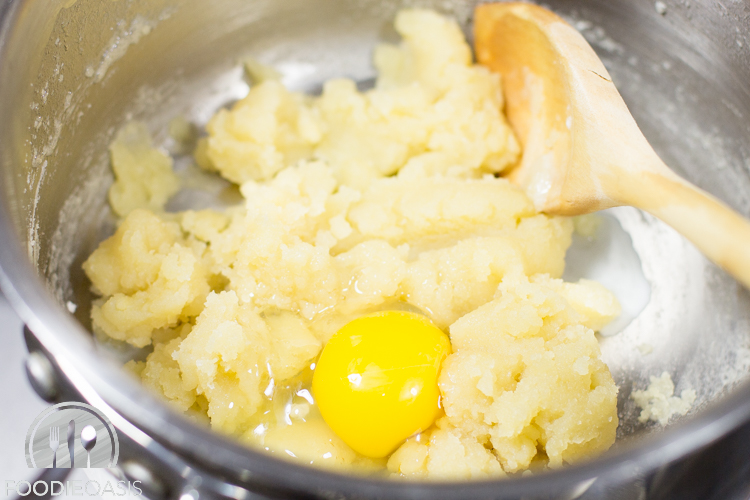
When the mixture has cooled a little, add 1 egg (see photo below).
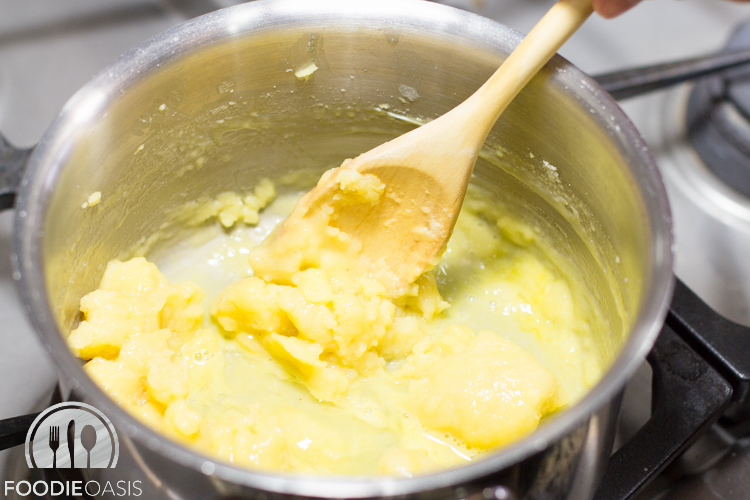
After adding the first egg, beat the pastry mixture until the egg is fully incorporated into the mixture. It will take a little muscle to beat the eggs into the mixture, so beat vigorously. Just consider this your arm workout for the day! If you need help, you can use a mixer, but I prefer the results from doing this step by hand—partly because of less clean up!
Now, add the second egg. The photo below shows the consistency after beating in the first egg and just starting to beat in the second egg.
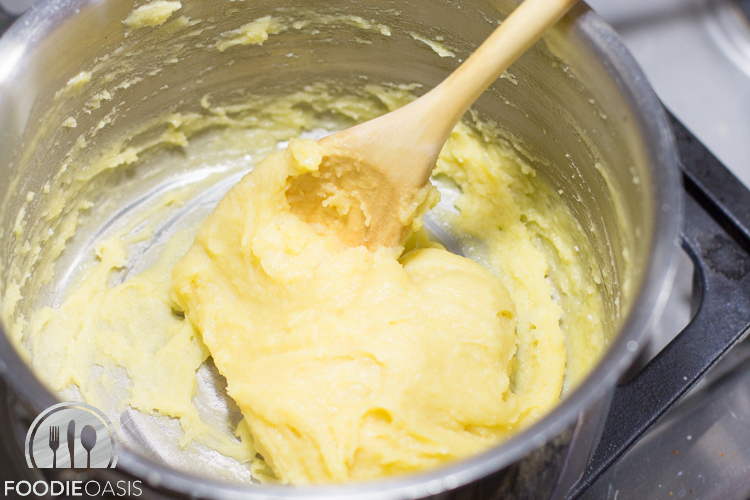
Back to more vigorous beating! It is ready when it looks like the photo below. It will still be a little sticky but not wet.
I like making mini versions of these puffs and have found that it is easiest to use a pastry bag or ziplock bag for portioning out the little balls of pastry dough. You will need to use a spoon to transfer the choux pastry to a bag. Then line a large baking sheet (or two small ones) with parchment paper.
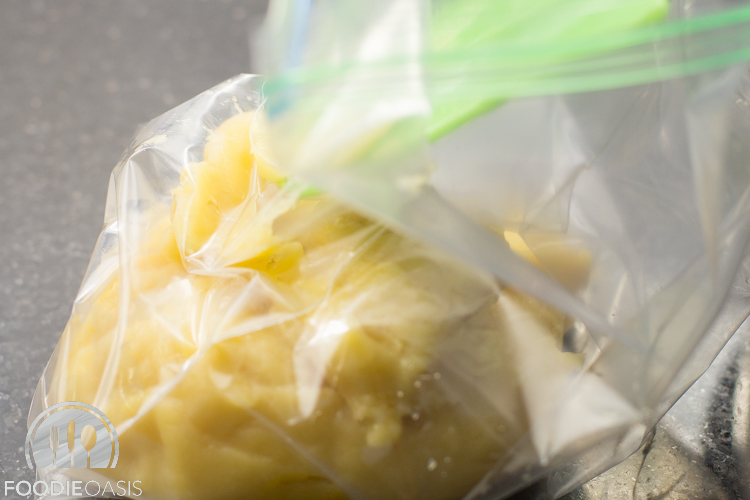
Cut about 1/2 an inch off the corner of the plastic bag. Use a knife to help you portion out small balls of dough that are about the width of a quarter or just a little larger.
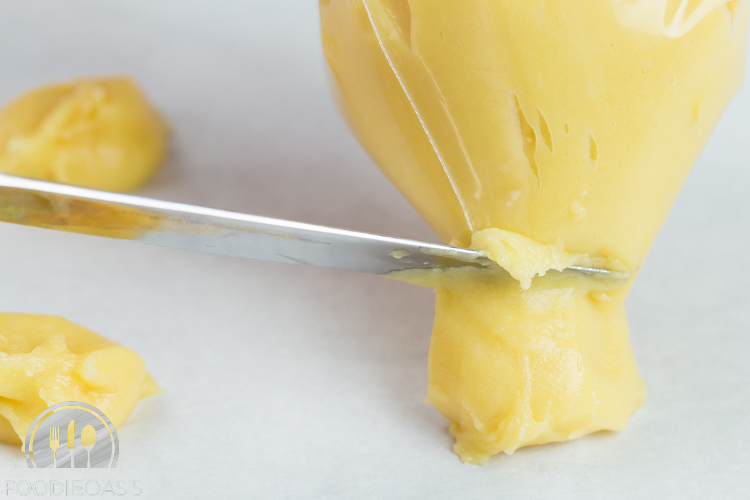
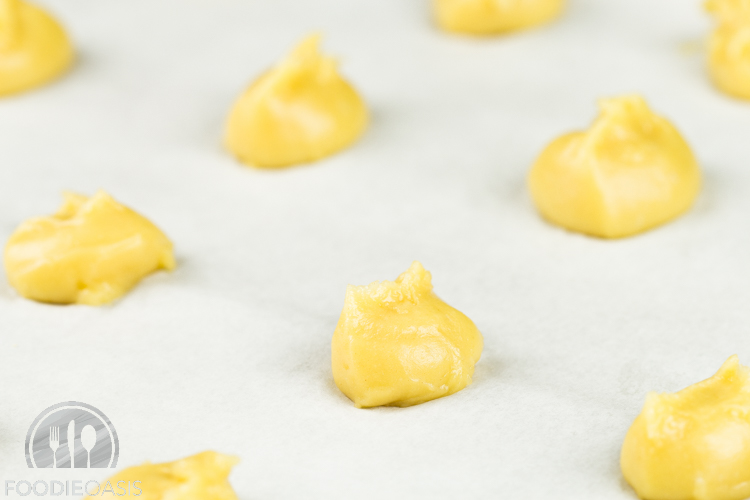
Use your finger to lightly push down any points on the top of the spheres.
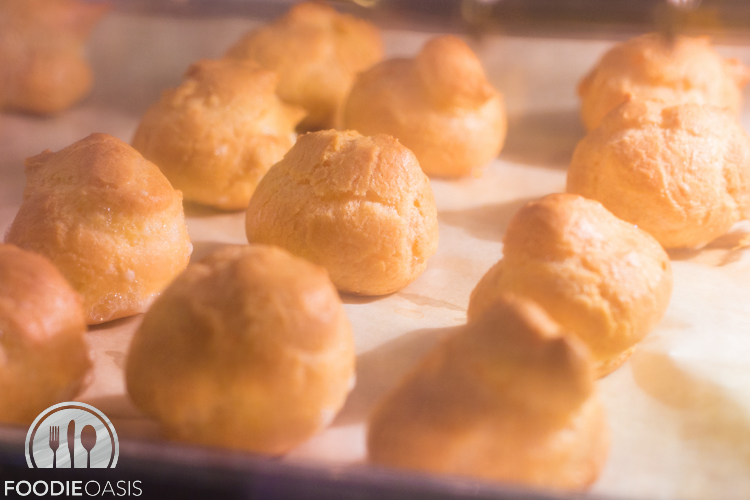
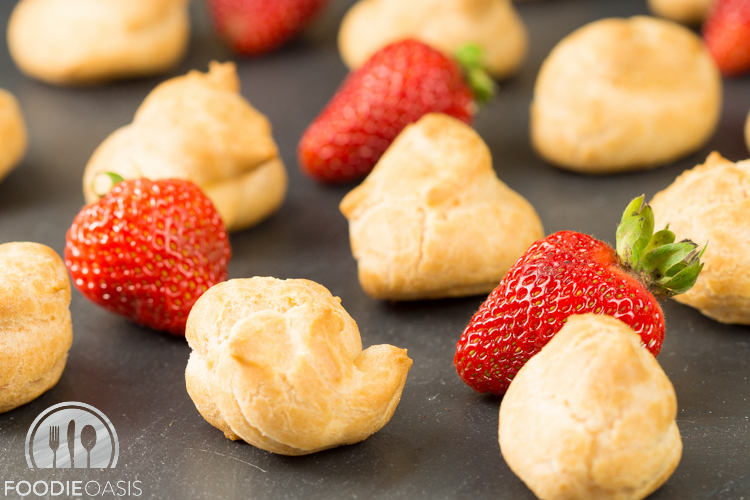
Place them in the oven and patiently wait about 22 minutes until they are golden brown (longer if you make larger versions). The ones below are almost ready. If you are worried about figuring out how long to cook then, portion out a couple in a parchment-lined pie or cake pan and bake them first. That will help you gauge how long to cook the size puffs you are making. If they collapse, then you didn’t cook them long enough. On the other hand, if the inside is dry or the bottoms or too brown, you cooked them too long.
They will be a little crunchier, or harder, when you first take them out of the oven than they will be later. There is moisture in the air that will cause them to soften a little as they continue to cool, so don’t worry if they seem a little too hard when you first take them out of the oven. Unless you really overcooked them, they will be fine.
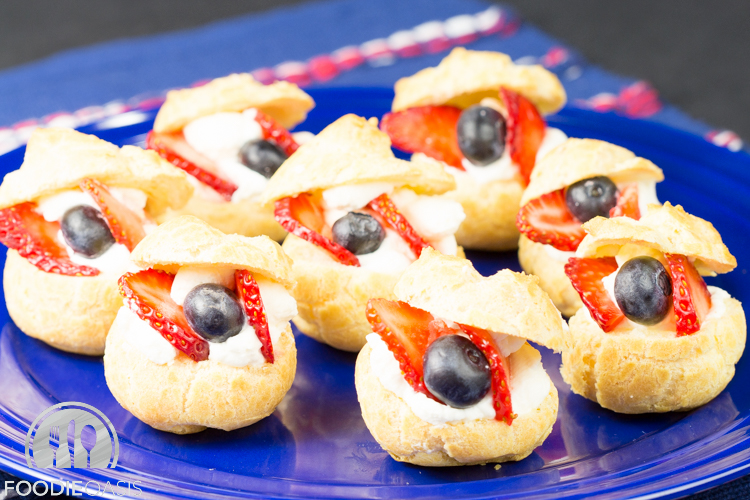
You will then have beautiful little puffs such as these that you can fill with your favorite sweet or savory fillings.
For a neighbor’s party, I filled the ones below with the same mascarpone whipping cream that I use for my berry shortcakes. Strawberry slices and blueberries gave them a little extra color.
If you are looking for fast, easy fillings you can also use pre-made pudding, ice cream, or pre-made whipped cream. Just remember that the pre-made whipped cream from the metal cans will fall quickly, so fill these at the last minute if you use it. If you use ice cream, then also grab some chocolate syrup or caramel sauce and drizzle on top. If you have a little more time, try the mascarpone whipped cream (click here for the recipe) or this easy pastry cream (click here for the recipe).
Enjoy! These are always hits and much easier than anyone thinks!
© 2015 FoodieOasis